
Security groups are an imperative element within any modern business critical application, and Dental Software is certainly no exception, SFD has made the management of permissions simple by ensuring centralised groupings rather than forcing the practice to manually assign permissions per user as in some Practice Management Software.
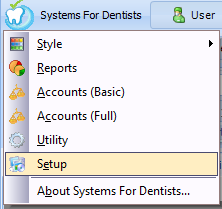
Start by entering Setup.
Once in Setup, click on the Users button 
Now click on the Groups button,  you should now be faced with a list of the security groups similar to the one below.

To create a new group we are going to click on the New button, however you will follow a similar process when editing the permissions of a group, simply choosing Edit rather than New.
The first tab we are faced with is the General tab, by unchecking the Active button you are disabling the group and thus rendering all its members unable to log into the dental software, so you should avoid this action where possible.

Enter a name for the group into the edit control, for this sample I have called the group "Hygienists"
Our next step is to define the actual permissions, click on the settings tab, you should note that all permissions will be defaulted to Deny, simply click the allow flag for any permissions you wish to grant to members of this security group.

A common mistake is to assume there are only four security sections, you should use the arrows shown above to scroll across, at the time of writing this FAQ there were 10 sections totalling 87 individual security options.
Once you have added all the options click on the Save button
Now you have created a new security group in your dental software, you can add members to the group, for details see this FAQ.
Request a demo »